Wednesday, January 28, 2015

SHOW YOUR LOVE-VALENTINE BLOG HOP


Hello!! Welcome to the SHOW YOUR LOVE- Valentine Blog hop. This blog hop is associated with the Heartfelt Sentiment team. If you are coming from Tonya Whitehust blog you are on the right track.
For  Valentine's Day,  I'm sending to each of my kids these cute candy treats and a cute card.

Candy Bar Packet


Supplies-

    • Holiday Tags stamp ( D1560)
    • Heartstrings paper packet ( X7193B )
    • Ribbon
    • 31/2" x 12" Solid card stock (Cranberry #1272)
    • 3-D glue dots (Z1151)
    • Scallop border punch (Z1851)
    • Paper trimmer
    • Adhesive- double sided


     Instructions-

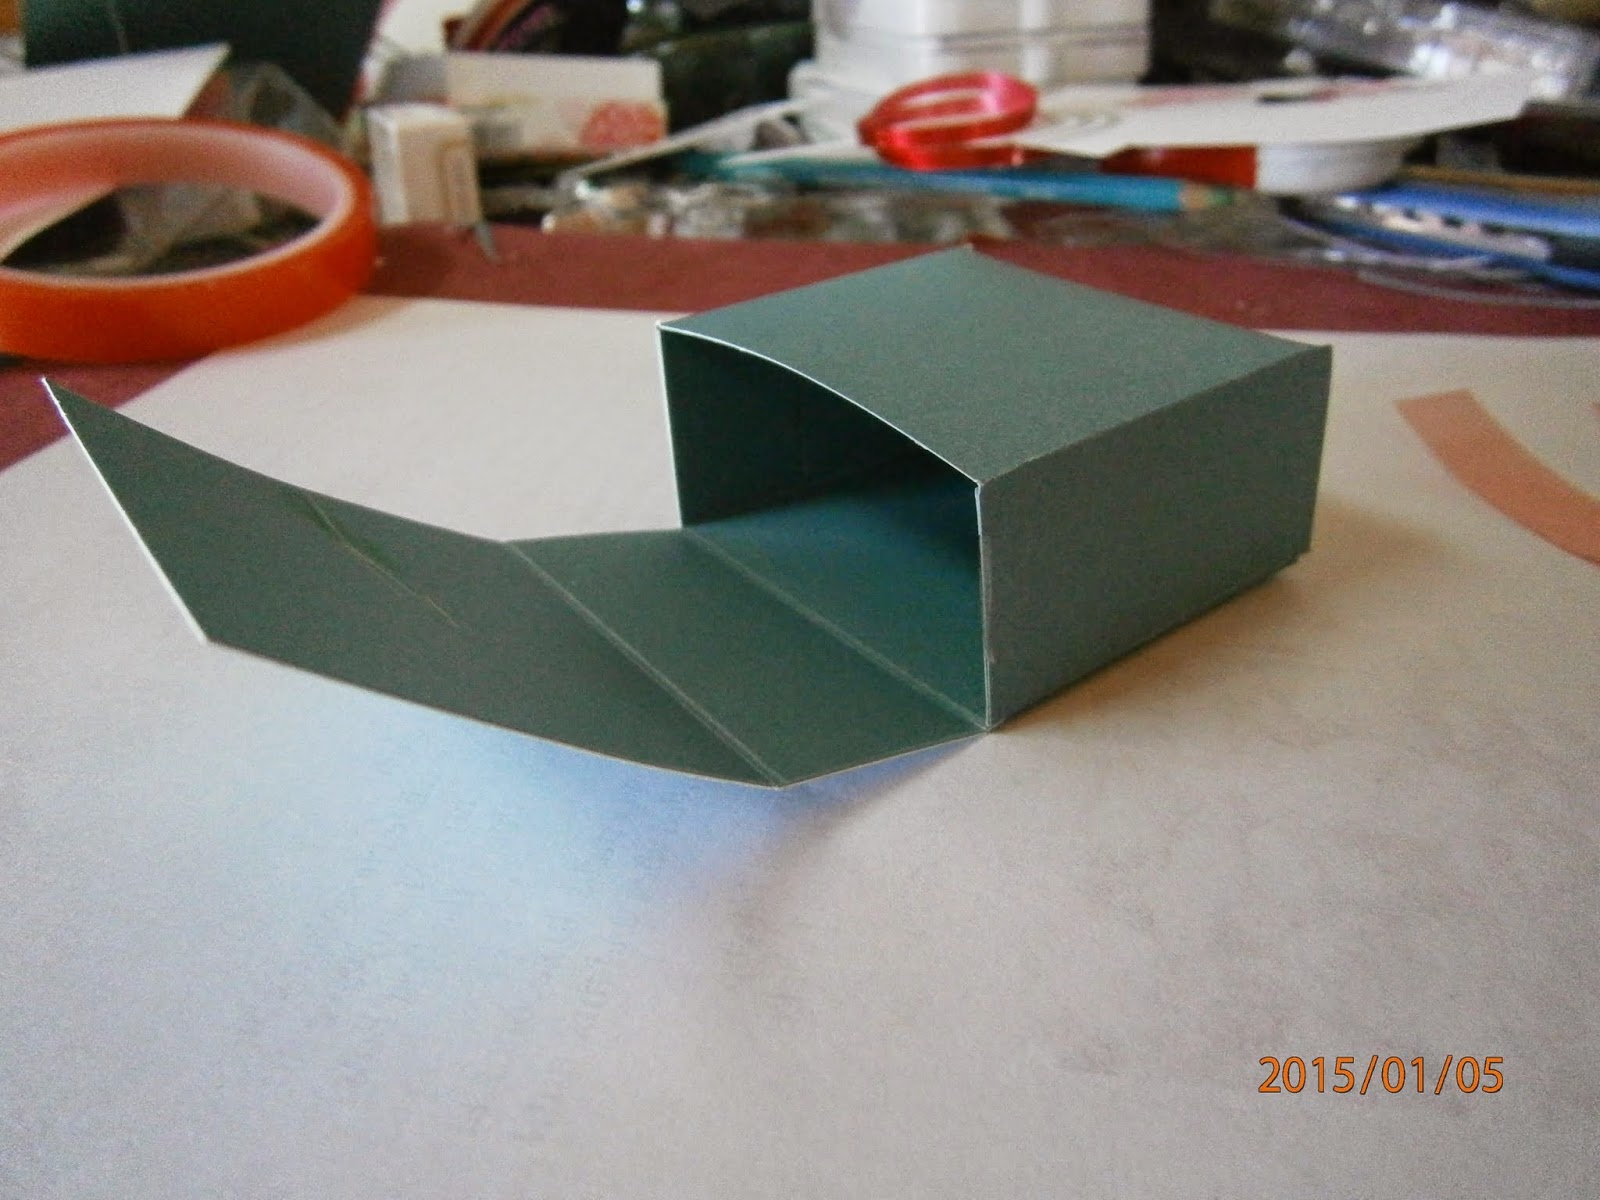
    Score your 3 1/2" x 12" at 6", 10". fold  as shown in the picture. Cut a 3 1/4" x 5" of design paper and glue to the front of the bottom half . Cut a 1" strip and use the scollop border punch and glue it to the from the inside flap as shown.


    cut a 31/4" x 1 3/4" and adhere to the font flap.  Glue both sides of the solid cardstock to create a pocket . Now you can start to decorate your your packet.  Very easy to make!!


    A Bunch of " HUGS & KISSES"


     I used an empty wide open mouth tea bottle filled
    with Hershey's kisses.


    Material -
    • 1- Empty bottle (small size)
    • 1- Bag Hershey's Hugs & Kisses candy
    • Heartstrings paper packet plus trims
    • January's stamp of the month " This Moment" (S1501)
    • Holiday Tag set (D1560)


    I glued paper around the bottle; then attached trim on top
     and bottom edge. Stamped XOXO and glued it to the
     center front as seen on the bottle.
    Fill with your favorite candy

    Decorate your bottle with bow


    YOU & ME


    Finish size:4 1/4" x 5 1/2"        


    Materials-
    Heartstrings paper packet
    Heartstrings complements ( X7193C)
    Scallop punch
    3-d tape
    Slate ink pad (Z2173)
    Cotton candy ink pad ( Z2193)
    2 1/2" scallop punch circle

    These are my there projects for you to see. Now hop on over to Melissa Robinson Blog.
     Happy Valentine's Day!!

    The following are the blog participants:

    1. Melissa Robinson - http://mlisrobinson.blogspot.com/2015/01/show-your-love-valentine-blog-hop.html
    2. Melissa David - http://melissadavidscraps.blogspot.com/2015/01/show-your-love-valentine-blog-hop.html
    3. Debi Barber - http://debiistheothersister.blogspot.com/2015/01/show-your-love.html
    4. Judy Faye Garner - http://judyfaye.blogspot.com/2015/01/heartfelt-sentiments-valentines-blog-hop.html
    5. Tonya Whitehurst - http://heartandsoulscrappers.blogspot.com/2015/01/show-your-love-valentine-blog-hop.html
    6. Aggie Peters-http://busyaggie.blogspot.com/2015/01/show-your-love-valentine-blog-hop.html


      Thursday, January 8, 2015

      Valentine treat

      Chirardelli Candy Box

       This cute little candy box is great to give out on Valentine's Day. I found this idea in Splitcoaststampers by Beate Johns. This box holds four Ghirardelli chocolates. You can go to http://www.splitcoaststampers.com/resource/tutorials/ghirardellibox/#ixzz3NnThaAOC for detail instruction on how to make the box.


                   Supplies:
      • one 4 1/4" x 8" piece of Lagoon cardstock  (x5762)
      • One 2 1/4" x 1" piece of Heartstrings paper ( x7193B)
      • Paper cutter
      • Scoring tool
      • Double side tape
      • Scissors
      • 3-d Tape
      • Stamp "Sweet" from Sweet & lovely stamp set ( D1571)
      • Lagoon ink pad  (Z2195)


      1.     Score the short side of your strip at 1" and 3 1/4".
      2.     Turn   to the long side and score at 2", 3", 5" and 6".


      3     Cut of the outer stripes 3"up one end. This will create your box flap. 
      4.     Use a bone folder to crease score lines.
      5. Cut the 1" score lines on both sides.
      See picture.


      6.     Add double-sided tape both 1" x 2" strips next to the box flap. 
      7   Flip your cardstock over and add tape to the 1" tabs. 
      8.     Remove the tape liner from the 1" tabs and fold inward. 
      9.    Remove the liner from the 2" strips and bring sides together to form box.


      10.     Trim box flap. Here, it was cut down 7/8". 
      11.     Your box is done. It's time to decorate it. 
      12.  Adhere patterned paper around your box


           Create a closure for the box by stamping or punching a small image.
      Add 3-D foam tape on the lower part of the back of that image.
      Remove liner and adhere the punched piece to the lower part of your box so that the lid can slipped underneath.


           Fill with chocolate.


        Tuesday, January 6, 2015

        CTMH January Promo's


        Extra! Extra! Hostess Rewards

        In January, receive up to 50% more Hostess Rewards

        During the month of January, all Gatherings that reach $350 USD/CAD or higher, will be eligible to receive up to 50% more Hostess Rewards! This means an additional $30 USD/CAD, giving you the opportunity to earn up to $230 USD/CAD or more in select free products. This offer is only available during January and is the ideal pairing for your National Papercrafting Month Gatherings, so join in the celebration and watching your earnings grow!
        Contact me for more details.
        *Offer valid January 1–31, 2015. All Hostess Rewards items will be shipped FREE to qualifying hostesses. However, the hostess will be charged shipping on any amount they go over the Hostess Rewards amount. In Canada, free items are not taxable. In the US, tax will be based on the full retail amount of the free item(s) in these 11 states: Arizona, Arkansas, California, Georgia, Idaho, Illinois, Minnesota, New York, North Carolina, Texas, and Utah. If you live somewhere other than one of these states, no sales tax will be assessed on free Hostess Rewards items. For Hostess Collections and 50% off items, tax is only charged on the discounted amount paid, not full retail value. Tax is charged on the full overage amounts. 
         

         Share the love with January’s Stamp of the Month


        Beautiful Stamps, Amazing Discounts

        Each month you can purchase a new D-size stamp set, available for one month only, for just $5 — that’s over 70% off retail! When you place an order of $50 or more in Close To My Heart products (excluding purchases made in Studio J®), you qualify for this special Stamp of the Month pricing.

        January 2015: This Moment (S1501)

        Spend $50 and get this Stamp of the Month set for just $5.

        Monday, January 5, 2015

        CTMH Paper Focus- Blog Hop


        Happy Mother's Day!

         Welcome to the CTMH Paper focus blog hop. This blog comes to you from the Heartfelt Sentiment team. If you are coming from Debi Barber blog spot , then you are on the right
        track. This month I made a Mother's Day card using using the Heartstrings paper packet.
        This card has a removable book marker that she can use. Don't forget to put your name on the back so she can remember you all the time.

        Supplies:

        Cardstock: cranberry, lagoon, white daisy
        B&T duos Heartstring paper packet
        Hearts ( stuck on you # Z3037)
        Adhesive
        Score board
        1/2" ribbon- red
        Boarder strip from Snowheaven paper
        3-D tape

         Cut:

        Cranberry cardstock cut one 2 1/2" x 6 1/2"
        Lagoon cardstock cut one 2 1/8" x 6 1/8") and one 1 3/4" x 3"
        White daisy cardstock cut one 6" x 6 1/2" and one 11/2" x 2 3/4")
        B&T Duos paper cut two - 2" x 6"
        Back
        Front

        Book marker-

        • Adhere to (2 1/8" x 6 1/8" ) Lagoon cardstock to the B&T paper. one in from and back as shown.
        • Print your saying and cut it and glue to the Lagoon card stock.
        •  
        • adhere to the 2 1/8 "x 61/8" using 3-D tape.
        •  Decorate with heart stickers. Set aside.


        Card-
        • Score white daisy (6" x 6 1/2") at 3". fold.
        • adhere the Snowheaven strip to the folded side of the card.
        • Glue the cranberry cardstock next to the strip.
        • Use two small pieces of tape to attach the book maker as shown on the picture. 
        Finish size:  3" x 6 1/2"


        Hope you had fun going thru my blog. Now continue to  
        Tonya Whitehurst  blog for more inspiration.

        The following are the participant in the blog hop:


        1. Melissa David* www.melissadavidscraps.blogspot.com
        2. Debi Barber* http://debiistheothersister.blogspot.com
        3. Aggie Peters http://busyaggie.blogspot.com/
        4. Tonya Whitehurst - http://heartandsoulscrappers.blogspot.com
        5. Judy Faye Garner - http://judyfaye.blogspot.com
        6. Debi McBain - www.createdwithheart.blogspot.com

          Sunday, January 4, 2015

          New Tote Bag is here!


          Rolling Tote
          Durable rolling bag designed to hold organizers
          in various sizes. Top zips all the way down for
          easy loading. Front pocket sized to fit
          12" μ 12" paper, plus two additional side pockets
          to store more! Finished size 25½" μ 16" μ 17½".
          Some assembly required.
          $149.95 USD/$164.95 CAD Z3032

          New Rolling tote bag


          Shoulder Tote
          Shoulder bag with snap closure. Comfortably
          fits our 12" μ 12" paper organizers. Perfect for
          carrying projects in progress, idea books,
          papers, small tools, and embellishments.
          $26.95 USD/$29.75 CAD Z3031